How to Crate Train Your Dog or Puppy (The Right Way)

From Cage to Kingdom: A Humane Guide to Crate Training Your Dog
Few topics in the dog world are as debated as the crate. To some, it looks like a “cage”—a tool for confining and punishing. But when approached with patience and positivity, the crate becomes something entirely different: a personal den, a safe sanctuary, and one of the most powerful tools in your dog wellness toolkit. A properly crate-trained dog doesn’t see their crate as a jail; they see it as their private kingdom, a place where they can retreat, feel secure, and truly relax.
This isn’t about teaching your dog to tolerate being locked up. It’s about tapping into their natural denning instinct and building such a powerful positive association with the crate that they choose to go in on their own. This guide will provide a humane, step-by-step plan for positive crate training that will help with house-training, prevent destructive behavior, and give your dog a priceless sense of security for life.
Choosing the Right Kingdom: Picking the Perfect Crate
Your first step is selecting the right type and size of crate. The goal is to create a space that feels like a cozy den, not a giant playroom.
- Types of Crates: Wire crates are popular for their ventilation and portability, and they often come with a divider to adjust the size as your puppy grows. Plastic “airline” crates offer a more enclosed, den-like feel which some dogs prefer. Furniture-style crates are designed to blend in with your home decor.
- The Right Size: This is crucial. The crate should be just large enough for your dog to comfortably stand up, turn around, and lie down. If it’s too big, a puppy may be tempted to use one end as a bathroom and the other as a bedroom, which defeats the purpose of house-training.
The Golden Rule: Making the Crate the Best Place on Earth
Before you ever close the door, your mission is to convince your dog that the crate is a magical place where only wonderful things happen. This is all about building a positive association.
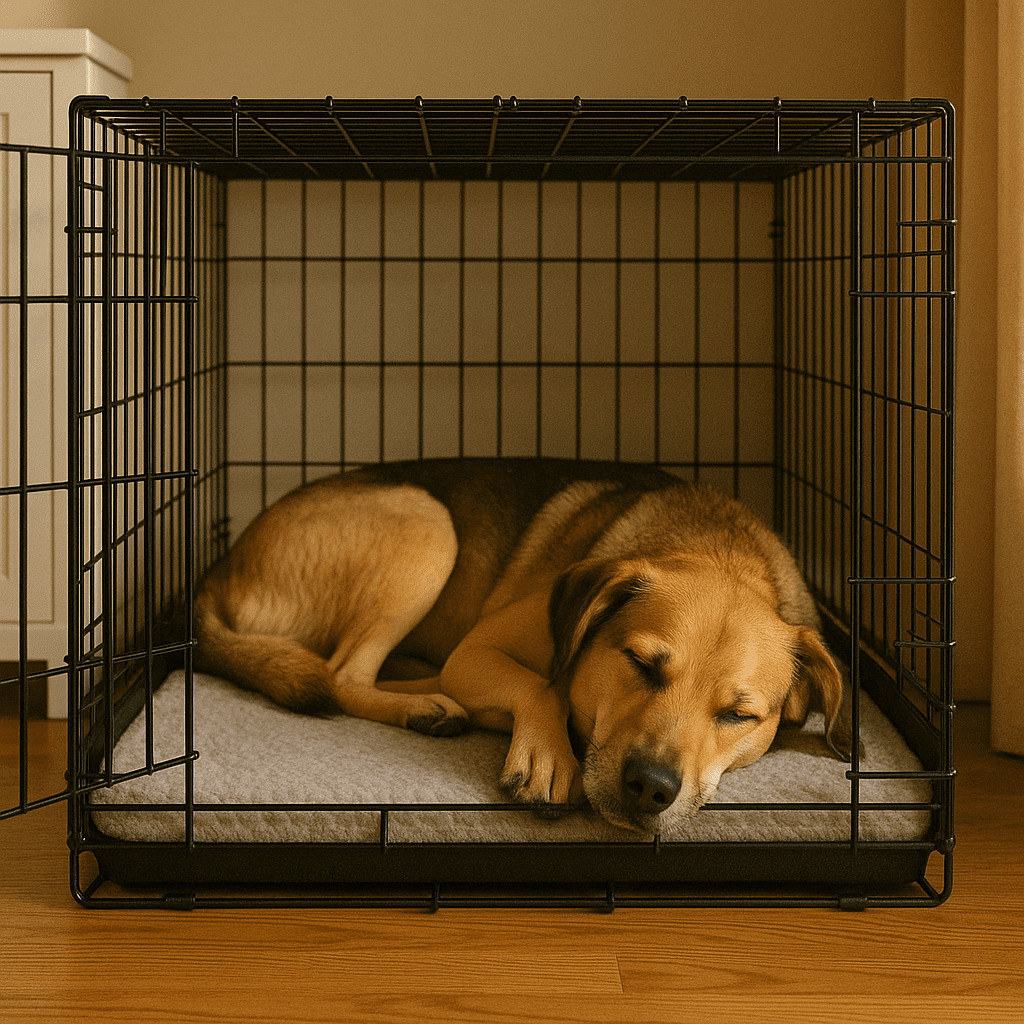
- Prime Location: Place the crate in a social area of the house, like the living room or family room. Dogs are pack animals and don’t want to be isolated. Being near you will make the crate feel like part of the family hub, not a punishment zone.
- Ultimate Comfort: Make the crate the most comfortable spot in the house. Fill it with a soft, durable bed or blankets.
- Fine Dining: Start feeding your dog all their meals inside the crate. At first, place the bowl just inside the door with the door remaining wide open. As they get more comfortable, you can move the bowl further back.
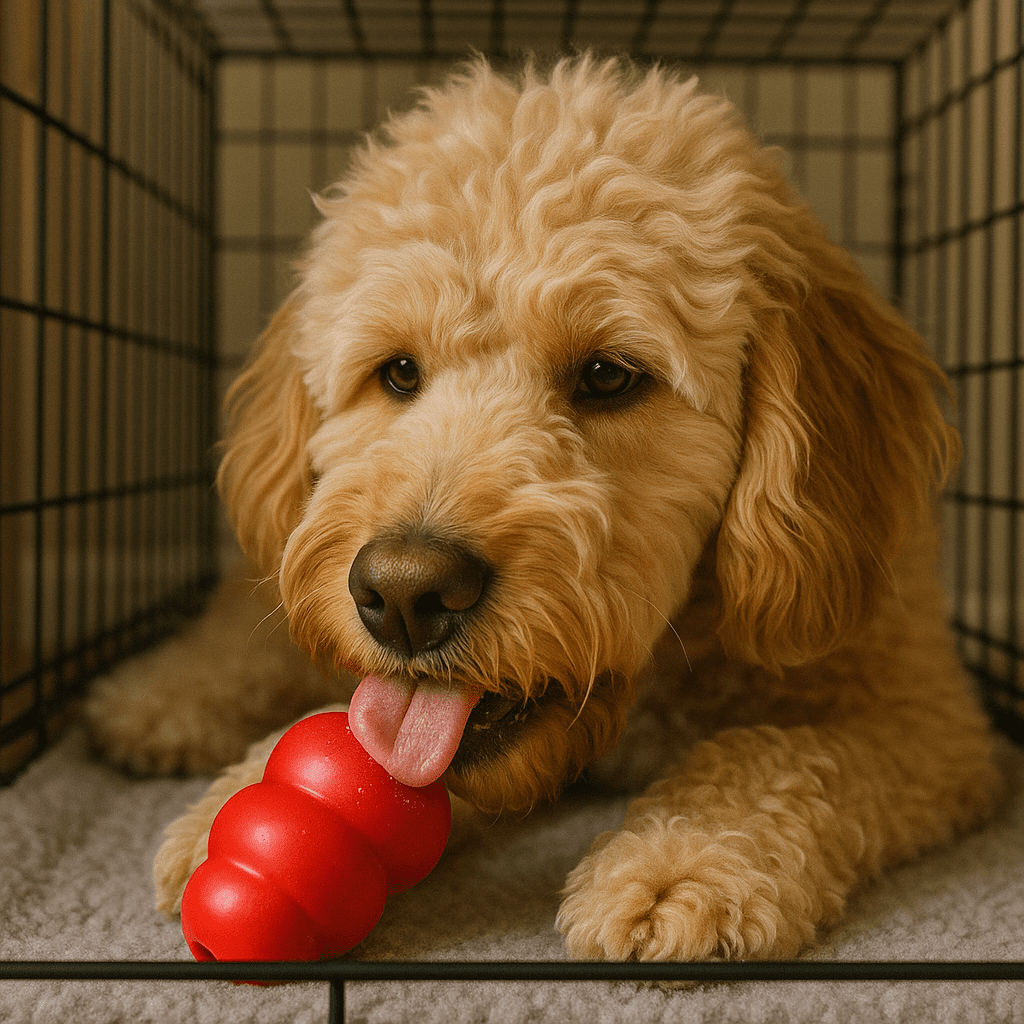
- The “Crate-Only” Jackpot: Give your dog a very special, high-value chew toy (like a Kong stuffed with frozen peanut butter or a favorite bully stick) that they *only* get when they are in their crate. This makes crate time a highly anticipated event.
The Step-by-Step Training Plan (The “Crate Games”)
This process should be slow, fun, and always end on a positive note. Never force your dog into the crate.
Step 1: The Open Door Policy
Your goal here is to get your dog to love going in and out of the crate voluntarily. Sit near the crate and, in a happy voice, toss high-value treats inside. Let your dog go in, get the treat, and come right back out. Make it a fun, low-pressure game. Repeat for just a few minutes at a time.
Step 2: The Touch-and-Go
Once your dog is eagerly entering the crate for treats, you can begin to introduce the door. Toss a treat in. When they go in, gently close the door for just one second, then immediately open it and give them another treat. Gradually increase the duration: close door, treat, open door. Then close door, wait two seconds, treat, open door. The goal is to teach them that the closed door is not scary and always results in a good thing.
Step 3: Short Stays While You’re Home
Now, build up the duration. Give your dog their special crate-only chew toy (like a stuffed Kong). Once they are happily engaged, close the door and stay in the room with them. Let them out after just a few minutes, *before* they finish the toy and before they have a chance to get anxious. You want to leave them wanting more.
Step 4: The First Departures
Once your dog can stay happily in the crate for 10-15 minutes while you are in the room, you can practice leaving. Give them their special toy, close the door, and walk out of the room for just a few seconds. Return before they get worried. Gradually increase the amount of time you are out of sight. This is the foundation for leaving the house.
Crate Training Don’ts: Common Mistakes to Avoid
- NEVER Use the Crate as Punishment: This is the fastest way to ruin all your hard work. The crate must always be a sanctuary. If you need a time-out spot, use a separate, gated-off area.
- DON’T Leave Them in Too Long: A dog shouldn’t be crated for longer than they can comfortably hold their bladder. A general guideline for puppies is their age in months plus one (e.g., a 3-month-old puppy can handle about 4 hours). Adult dogs should not be crated for more than 6-8 hours at a stretch.
- DON’T Let Them “Cry It Out”: While a little bit of mild whining at the beginning can be ignored, true distress (panicked barking, howling, trying to escape) means you have moved too fast. Letting a dog “cry it out” can lead to separation anxiety and a severe fear of the crate. If they are panicking, let them out, end the session, and go back to an easier step in your next training session.
Conclusion: The Gift of a Safe Space
Humane, positive crate training is one of the most valuable gifts you can give your dog. It’s not just a management tool; it’s a wellness practice. It provides a sense of security during stressful times (like thunderstorms or having guests over), keeps them safe from household dangers when you can’t supervise them, and gives them a personal space that truly belongs to them. With patience and consistency, you can transform that simple box from a “cage” into your dog’s favorite kingdom.